User Guide
Kick-start your work by creating your Office document based on the latest and most up-to-date templates served to you in your favorite Office application on any device or platform.

Once the 'Template Chooser for Office' App has been assigned to you or you have acquired it via the Office Store/AppSource, it will automatically appear in the 'Home' tab of your Office application ribbon. To launch the App best click on the 'Templates' button. Be aware that the name of the Button 'Templates' can vary based on the Office language you are using. Please note that the icon for the 'Templates' button might vary depending on what Office application you are working in.
Once the 'Template Chooser for Teams' App has been added to a channel of a Team it will be accessible as a channel Tab/App. To launch the App best click on the 'Templates' tab. Please note that the name of the 'Template Chooser for Teams' tab can vary as it can be renamed freely.
Once the 'Template Chooser for SharePoint' App has been added to a Site Collection in SharePoint it will be accessible as a button on any document library within that site collection. To launch the App best click on the 'Templates' button. Be aware that the name of the button 'Templates' can vary based on the browser language you are using. The Button will unfortunately not be available on Document Library Web Parts due to current SharePoint API limitations.
Type in 'https://templatechooser.officeatwork.com' in your browser URL field to navigate to the 'Template Chooser for the Browser'.
To get started with this Add-In/App you need to connect it with your existing Microsoft 365 Work or School account or with your Personal Microsoft Account. Follow these steps:
Please note:
If your Office application supports SSO (Single sign-on) you will not see this welcome screen and be directly signed in to the officeatwork Add-in/App with the same account you signed into your Office application.
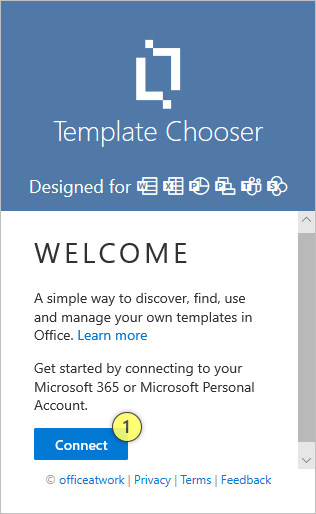
Click on the 'Connect' (1) button.
Sign-in using your Microsoft 365 (Work or School) account or your Personal Microsoft Account.
You might be asked to consent to the Add-In accessing your data. This step might have been taken care of by your internal IT department in advance. In that case you will not be asked.
Done.
Please note:
The actual sign in experience is provided by Microsoft. officeatwork does not offer any user accounts. Users must use their existing accounts to sign in to the Add-In.
Please note:
For Office application versions that do not support automatic SSO (Single sign-on), users will have to repeat this sign-in step periodically, dependent on their Azure AD settings. Usually, this Azure AD setting is set to 90 days. This setting can be changed by each customer individually in Azure AD.
Please note:
You will not be able to sign in to the 'Template Chooser for Teams' or the 'Template Chooser for SharePoint' with another user than the one you used for Teams or SharePoint. So if you want to switch the user in the 'Template Chooser for Teams' or the 'Template Chooser for SharePoint' you need to re-sign-in to Teams or SharePoint with that user.
This Add-In accepts Microsoft 365 Work or School accounts. It also accepts Personal Microsoft Accounts including GitHub accounts.
The first time you connect the app, you might be asked to consent to the permissions required by the app. Please go through those permissions carefully and grant consent as the App requires these permissions to function. If you do not grant consent, the app will not work for you.
Please note:
Your IT administrator can pre-consent on behalf of all users. That way you and your fellow users would not have to consent each individually. Your IT administrators can learn more about pre-consenting here.
You can find the app menus at the bottom of the app. It currently consists of the 'officeatwork' logo (on the left) and (on the right) the 'Settings' menu, the 'Help' menu, and the 'User' menu. Clicking on the officeatwork logo will take you to the officeatwork website.
Please note:
Dependent on the officeatwork app and its configuration for your Microsoft 365 tenant, items available in the app menus may vary.
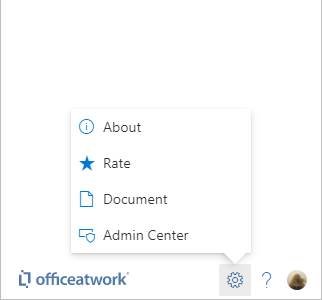
About: This will take you to the about pane that lists various information about this app.
Rate: This will take you to the review page on Microsoft AppSource.
Document: This will take you to the document settings page of this app.
Admin Center: If you are an officeatwork admin, you will see the 'Admin Center' option that will take you straight to the officeatwork 'Admin Center' app.
The help menu is customizable via the officeatwork 'Admin Center' App. The description below explains the standard officeatwork experience. It's also possible that the help option is completely missing (No help experience) or is showing different elements in the case where your officeatwork admin has chosen to go for a custom help experience.
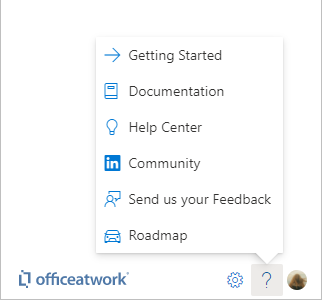
officeatwork standard help experience
Getting Started: Link to a page that will help you get started with this Add-In or App.
Documentation: Link to the documentation of the Add-In or App.
Help Center: Link to the officeatwork Help Center.
Community: Link to the officeatwork community on LinkedIn.
Send us your Feedback: Link to an online feedback form you can use to reach out to officeatwork.
Roadmap: Link to the roadmap page of the Add-In or App.
Additionally to the help experiences listed above, you might also want to consider the following (free and paid) options:
Learn more links: Throughout the app, you will find 'Learn more' links that will take you to the documentation pages covering the topic you are currently viewing. These links are the fastest way to pull up the relevant documentation.
Premium Support: Customers with a Premium Support Subscription can use additional support offerings and channels made available via the premium support subscription.
Your internal resources: You will most likely have internal resources covering the Business aspects or IT aspects of this App. Please also consider reaching out to them when appropriate. Thank you.
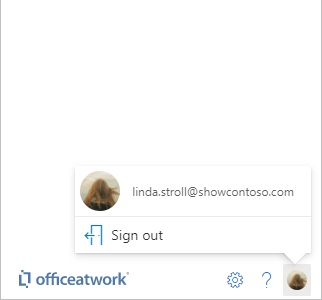
Signed-in User: You can see the photo, name, and email address of the currently signed-in user at the top of the User menu.
Sign out: This option will allow you to sign out of this Add-In/App.
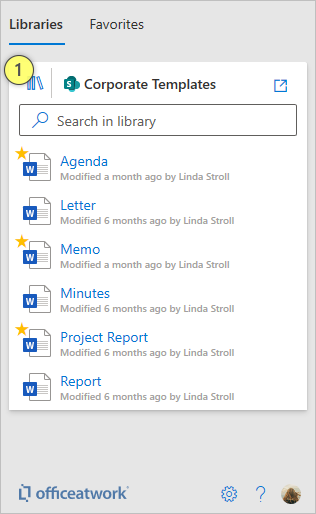
To switch a library just click on the library icon (1) at the top of the Add-In. That will bring up a list of all available libraries for you to choose form. You can then just click on one of the libraries to switch.
Click the 'Library' (1) icon.
The library selection pane will appear.
Select a library.
Done.
Once you have loaded a template library you can easily create a new document base on a specific template by clicking anywhere (1) on to one of the listed templates.
In Office
Click on any template.
A new document will be created based on the template you have clicked on.
Done.
Please note:
Dependent on your Office application and its version you might have to complete the download of the template via your browser. In that case follow the on-screen instructions and switch to your browser to download and open the template.
In Teams, SharePoint & the Browser
Click on any template.
Type a name for the new document.
Select one of the creation options.
Done.
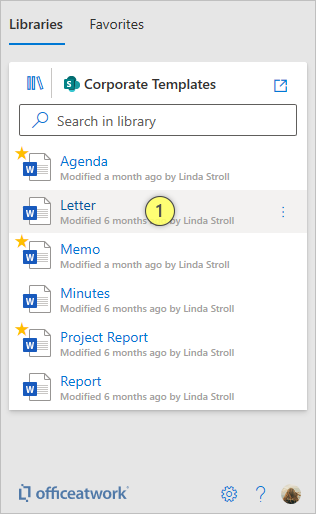
When hovering over a template you will see three dots (the template menu) to the far right of the template entry. Click on the button to explore the options.
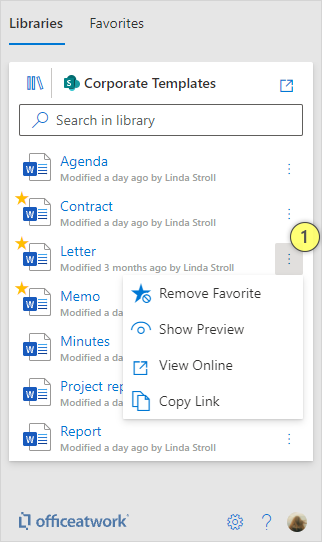
Click into the template menu (1).
Choose one of the options.
Add Favorites will add this template to your favorites list.
Remove Favorites will remove the template from your favorites list
Show Preview will show a preview of the template below the template item.
Hide Preview will hide the template preview.
View Online will open a new browser window to show you the template itself.
Copy Link will copy a link (URL) that can be pasted into any browser to launch the 'Template Chooser for the Browser' with the template pre-selected.
Done.
Use the search box (1) to search for contents with a specific name within the active template library.
Please note:
The search for SharePoint based libraries will will include all library columns as well as the file content.
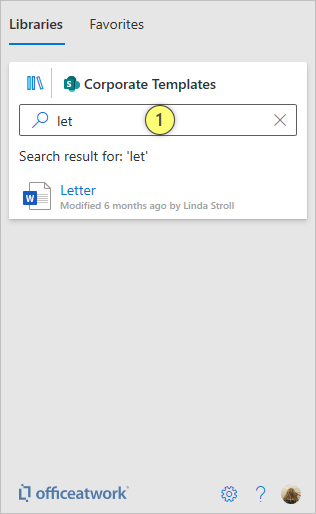
Click into the search box.
Type your search criteria.
Hit Enter on your Keyboard.
Done.
Please note: Searching across multiple libraries is currently not supported.
Use the ‘breadcrumb’ navigation element (1) to move up your folder hierarchy. To navigate into a folder just click onto its icon.
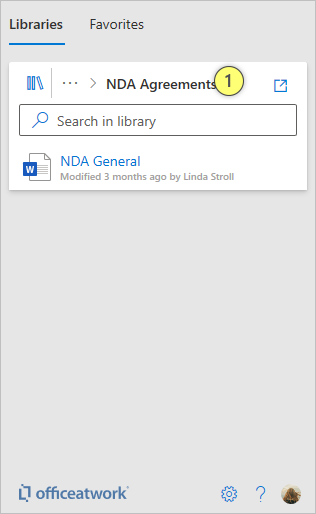
Click on a folder to navigate into that folder.
Click onto the breadcrumb to navigate back out of folders.
To manage your templates of the currently loaded library you just need to click on the 'View Online' (1) button. To manage templates from a different library you just need to switch to that library first before clicking on the 'View Online' button.
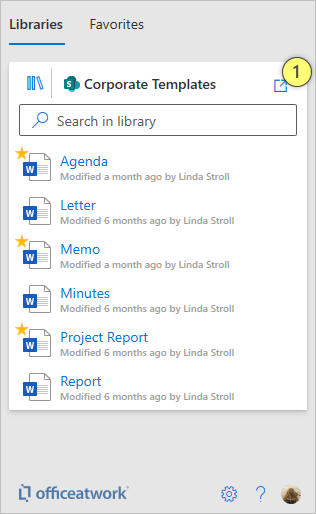
Click into the 'View Online' (1) button.
A new browser window will open showing you the current library
Done.
To see your favorites just click on the 'Favorites' (1) tab. To return to your Libraries just click on the 'Libraries' tab. Click on the Template Menu of the individual template to add or remove it to/from your favorites list. You can drag-and-drop your favorites items to sort them the way you wish.
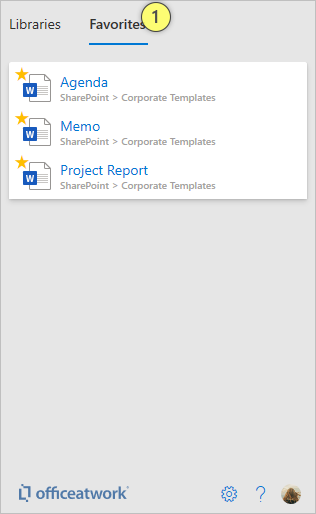
Click into the 'Favorites' (1) button.
Your favorites list will appear.
Done.
Each Office application supports its specific file formats. See below what Office applications supports what formats.
Formats marked in bold are the recommended formats to use as they offer the best overall experience.
Word


Excel


PowerPoint


Project


Teams


SharePoint
Browser
(1) Support for inline preview in Template Chooser Add-In
(2) Due to some missing API's for the template file format in PowerPoint and Excel we recommend to use the document file format for templates to get the best user experience when creating new documents.
(3) Due to some missing API's for the macro file formats in PowerPoint across platforms these files are only supported on Windows and Mac.
(4) Due to some missing API's for the macro file formats in Word across platforms these files are only supported on Windows and Mac with a simple browser download experience.
(5) Please be aware that Office Online does not support macros. The file can be created and opened in Office Online but the macros will not be available.
This feature is enabled by default. Licensed customers can disable this feature using the Admin Center App. Users signing in with a personal account or users using an evaluation license are not able to disable this feature.
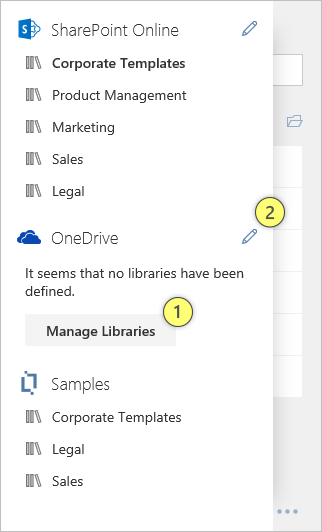
At first you might have not configured your OneDrive or OneDrive for Business for the 'Template Chooser'. In this case, you will find a 'Manager Libraries' (1) button below the 'OneDrive' library header. If you already have set up some libraries, you will not see the 'Manager Libraries' button. In this case, you can use the 'Pen' icon (2) to start managing your libraries.
Please note: Organizational users that sign in with their Work or School account can choose to disable OneDrive support within the Template Chooser. This can make sense in case you want all your templates organized in SharePoint/Teams and not promote the management of templates on an individual level.
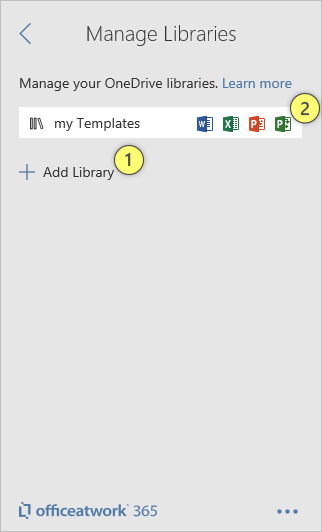
To create a new library just click on the 'Add Library' (1) button. A flyout appears, that will allow you to select a folder. Navigate and select to the folder you wish to use as a Template Library and click on 'Create Library' button at the bottom of the list. With this you have created a new Template Library linked to the folder you just selected.
To edit an existing library just click onto the library entry (2) in the list of libraries. To remove the library just click on the 'Remove' button at the bottom of the library properties. To rename the library just click into the 'Name' field and change the name accordingly. Use the arrow back at the top of the page to return to the libraries list.
You might want this app to open alongside your document automatically. To actively embed the Add-In into your currently open document, please follow the steps below:
Open the Add-In 'Settings' menu.
Click on the 'Document' option.
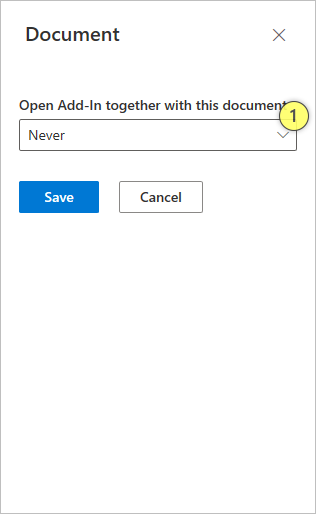
On the 'Document' pane, choose your Embedding option (1).
Click 'Save' to save your changes.
Attention:
Please be aware that automatically launching an app, together with a document, will only work if:
The user opening the document, with the embedded app, has the app available already, and,
The Add-In deployment method is the same for both the user who embedded app and the user opening the document, with the embedded app.
For example, if one user acquired the app from the Office Store, and the other user acquired the app via centralized deployment, the embedding will not work for both users. It will only work for the user who embedded the app in the document. To avoid this platform limitation, please ensure that all your users in your organization acquire the app using the same deployment method, preferably using centralized deployment.
Choose this option if you do not want the Add-In to open together with your document (default setting).
Choose this option if you want the Add-In to only open the next time you open your document, after that it shall not open automatically anymore.
Choose this option if you want to have the Add-In open together with your document all the time. Note that the Add-In will also open if you close your document with the Add-In closed and then re-open the document.
Please note that the following integration options can be combined to provide the ultimate integration experience.
Templates can be integrated into any system that support calling URLs. You can obtain a deep link for a template using the 'Copy Link' option in the Template Menu.
The link we create for a template contains different parameters so that we can do our best to keep the link working even if you do one of the following:
Renaming a template ✅
Updating metadata of a template ✅
Moving a template around (into a different folder) within the same document library ✅
Renaming folder names of folders the template is located in ✅
Renaming a template AND renaming folder names of folders the template is located in AND moving the template to a different location within the same document library ✅
Deleting the template and re-creating it at the EXACT same location with the EXACT same name ✅
The following manipulations to a template will break the template link:
Deleting the template and recreating it with the same name at different location within the same document library ❌
Deleting the template and recreating it with a different name at the same location within the same document library ❌
Moving the template to a different document library ❌
https://templatechooser.officeatwork.com?template=[link]
The [link] will automatically be generated when clicking the Copy Link option in the Template Menu. This query parameter can be combined with other query parameters the Template Chooser supports, like the inject query parameter.
The Template Chooser offers an iFrame based embedding experience allowing LOB applications to integrate the Template Chooser picking experience withing their own LOB Application. Details coming soon.
The Template Chooser supports injection of data into a newly created file during the document creation process (creating a document based on a template). Details coming soon.
The Template Chooser supports uploading a newly created file during the document creation process (creating a document based on a template). This feature is based on the Template Chooser for the Browser. The https://templatechooser.officeatwork.com URL can be enriched with an uploadUrl query parameter that contains the URL the new document should be uploaded to. If the upload server supports bearer token authentication, then you can include the Client ID of the upload server in the uploadClientId query parameter which allows the Template Chooser to obtain a bearer token.
https://templatechooser.officeatwork.com?uploadUrl=[URL]
https://templatechooser.officeatwork.com?uploadUrl=[URL] uploadClientId[ClientId]
The [URL] can be static or dynamically generated by the integrating system. This query parameter can be combined with other query parameters the Template Chooser supports, like the template= query parameter.
The [ClientId] needs to be from your app registartion that will allow the Template Chooser to obtain a bearer token. This query parameter can be combined with other query parameters the Template Chooser supports, like the template= query parameter.
In your response you can include a redirectUrl. If you do the template chooser will navigate to that URL once the uploading is complete.
Please note:
Any URLs provided must be URL encoded.
Business Operations Guide
This Business Operations Guide is aimed at users that are responsible for the successful implementation and running of the officeatwork Apps and Add-Ins in their organization. This guide also includes a Roadmap section where you can learn more about existing and upcoming features.
The following Apps and Add-Ins are included in the Template Chooser.
Template Chooser for Office – Office Add-In covering Word, Excel, PowerPoint, and Project {Rate this Add-In}
Template Chooser for Teams – Teams 'Tab' App {Rate this Add-In}
Template Chooser for SharePoint - SharePoint Add-In
Template Chooser for the Browser – Web App
Admin Center – Web App allowing you to configure your Add-In experience.
The 'Template Chooser' runs within the following Microsoft 365 applications on Windows, Mac, iPad and Office Online:


Please note: The 'Template Chooser' Apps might offer different features depending on the different Microsoft 365 applications on the various platforms.
Please note: The 'Template Chooser for Office' in Project is currently only available on Windows.
The 'Template Chooser' supports the following Microsoft 365 storage locations:

Please note: SharePoint, Teams, and OneDrive can be deactivated on a tenant by tenant basis using the officeatwork Admin Center.
The «Template Chooser» supports the following user accounts:

The 'Template Chooser' app will offer different features based on the account you are using or if you are a subscription user or not. If you are evaluating the app without a subscription you will not be able to configure all the options a paying user with a business subscription would be able to. If you sign in using a personal Microsoft account you will also not be able to configure any settings. Additionally, features available only to Microsoft 365 Users like SharePoint Online will also be missing.
Personal
FREE
when using a personal Microsoft account.
Supported Libraries
OneDrive
Teams
SharePoint
Tenant Settings
Feature Settings
Custom feature settings like disabling OneDrive or removing the LinkedIn and Feedback form link.
Advertisement Free
New users will receive no e-mails from officeatwork.
Sample Libraries deactivated
Business
Evaluation
when using a Microsoft 365 account for evaluation purposes.
Supported Libraries
OneDrive for Business
Teams
SharePoint
Tenant Settings
Feature Settings
Custom feature settings like disabling OneDrive or removing the LinkedIn and Feedback form link.
Advertisement Free
New users will receive no e-mails from officeatwork.
Sample Libraries deactivated
Business
Subscription
when using a paid subscription with a Microsoft 365 account.
Supported Libraries
OneDrive for Business
Teams
SharePoint
Tenant Settings
Feature Settings
Custom feature settings like disabling OneDrive or removing the LinkedIn and Feedback form link.
Advertisement Free
New users will receive no e-mails from officeatwork.
Sample Libraries deactivated
You can find our officeatwork on-boarding Guide in our officeatwork Help Center
Content libraries based on SharePoint document libraries can be configured via the officeatwork admin center. Learn more about this here.
By default the file name of the file in the SharePoint document library will be used to display your template in the 'Template Chooser' experience. Alternatively, you can give your template a different name by entering an additional name in the Title field. Providing a name in the Title field is optional and is not required for the template to appear in the 'Template Chooser' experience.
Attention:
Your Title field label might be translated in your SharePoint experience! So, in for example a French SharePoint document library user experience the title column would appear as Titre and not Title. Nevertheless, the column labeled Titre will work!
If you are sharing your templates across language regions you might want to translate the template names so that users can explore your template in their native language. To add translations to any template in your SharePoint document library you need to add an additional column per language. We offer a simple naming convention to enable this scenario:
Title + . + language code
So for instance, if you would want to show translated French template file names you would need to create an additional column named 'Title.fr'. Make sure you spell the column correctly in your first attempt as renaming the column might only give it a different label but not actually rename the column Name/ID. We also recommend to create new columns via the SharePoint document library 'Library settings' page to make sure your column gets named correctly. Once you have created the column you can go ahead and add a translation for each template file you wish to translate. Thereafter your users viewing the 'Template Chooser' in French will automatically see the translated French template names.
Here is a link to a list of ISO 639-1 language codes you can use:
http://www.lingoes.net/en/translator/langcode.htm
Attention:
Make sure you type your language code in lower case - upper case will not work.
Attention:
If your 'Title' field is translated in your SharePoint experience (for instance 'Titre' for French) you will still need to create your translation columns using the exact English spelling for your additional Title.LanguageCode columns.
Attention:
Please make sure that your Title.LanguageCode fields are defined as single line and not multi-line fields.
To translate the folder names shown in the 'Template Chooser' you would have to create a new SharePoint Content type for your folders that includes the translation columns like Title.fr and assign that folder content type to your document library. Please consult the SharePoint documentation on how to create and assign content types to document libraries.
This feature is enabled by default. Licensed customers can disable this feature using the Admin Center App. Users signing in with a personal account or users using an evaluation license are not able to disable this feature.

Initially you need to enable the Teams libraries feature. To do this you click on the enable (1) button. This will start an admin permissions flow that only Microsoft 365 Administrators can complete.
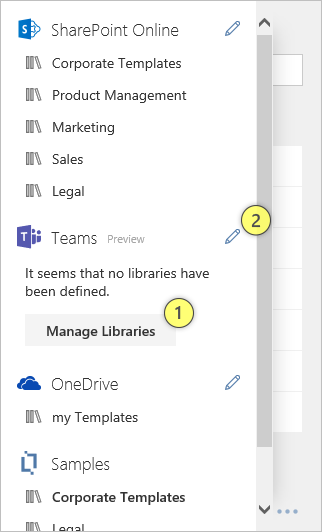
At first you might have not configured your Teams libraries. In this case, you will find a «Manager Libraries» (1) button below the «Teams» library header. If you already have set up some libraries, you will not see the «Manager Libraries» button. In this case, you can use the «Pen» icon (2) to start managing your libraries.
Attention:
Please note that only team owners can configure Teams libraries.
Attention:
Please note that private channels are not supported.
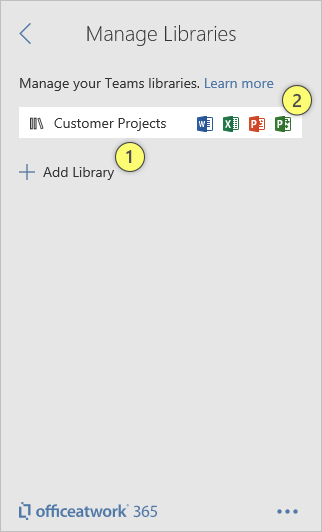
To create a new library just click on the «Add Library» (1) button. A flyout appears, that will allow you to select a Team, a channel and if you wish any sub-folder within that channel. Navigate and select to the channel or folder you wish to use as a Template Library and click on «Create Library» button at the bottom of the list. With this you have created a new Template Library linked to the channel or folder you just selected. Be aware that you can only create one Template Chooser library per team. So once you have created a library for a specific Team that team will not show up anymore in the flyout. Once you have created a Template library within a team that library will become visible for all your team members. There is no need for all team members to repeat this step of creating a teams library for any specific team.
To edit an existing library just click onto the library entry (2) in the list of libraries. To remove the library just click on the «Remove» button at the bottom of the library properties. You can not rename a Teams library as it will always show the name of the Team as the library name. Use the arrow back at the top of the page to return to the libraries list.
Teams uses SharePoint Online to store all files. So our officeatwork libraries in Teams are actually native SharePoint document libraries. Please check out the SharePoint Online Library section to learn more about to learn more about Template/Folder names and translations.
The 'Samples' libraries are here to help you to get a feeling of what the 'Template Chooser' can do for you without the need to set up your own libraries.
If you have not set up any of your own libraries the 'Template Chooser' will always select the first 'Samples' library for you by default when loading the libraries page.
All sample libraries including the 'Samples' group will not be visible to organizational users with a Microsoft 365 or Microsoft 365 Work or School account once you purchased a subscription and become a licensed customer.